


FTC Notice: This blog post contains affiliate links that go towards supporting the blog.
Almond milk is something that many people use nowadays, whether they are vegan or have dairy allergies. Sure you can buy some (non raw) almond milk at the store for your smoothies or cooking, but there’s likely going to be sugar, preservatives and other additives and synthetic stuff in it as well. While it is convenient to use pre made almond milk, it’s not a good idea to base your whole diet on processed packaged foods.
It’s very easy to make at home, and most cost effective if you enjoy using almond pulp in recipes like raw bars, cookies, crackers, or drying it out to use for almond flour. This raw almond milk is great for using in raw smoothies, raw banana ice-cream and raw dressings.
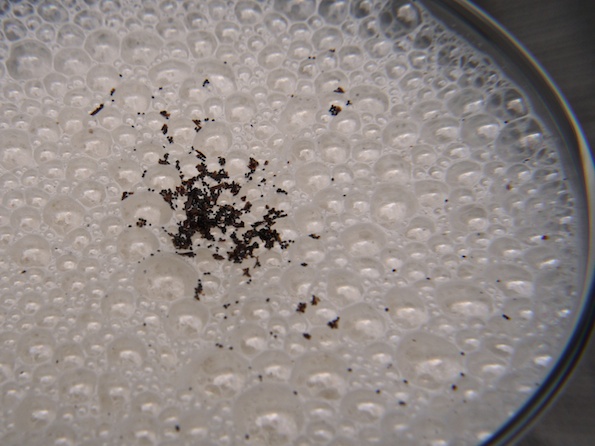
This low fat almond milk is also a nice pretty white colour and not browny tinged from additives like processed almond milk! Beautiful.
How To Make Your Own Homemade Raw Vegan Almond Milk
Ingredients:
1 cup of whole raw shelled almonds
Enough water to cover almonds if soaking overnight
4 cups filtered water (for making milk) If you want it even thinner use 5 cups of water.
Required tools:
Container to soak almonds
Metal mesh strainer/nut milk bag
Vitamix, Blendtec or other blender
Directions:
1. Soak almonds in a bowl or container with enough water to cover and let sit overnight, around 8 hours. (You can skip this step if you have a Vitamix or Blendtec)
2. Drain and rinse the almonds. Place into Vitamix or other blender with 4 cups of filtered water. Blend for about 45 sec to a minute on high. Just until all the almonds are in tiny pieces and it’s frothy.
3a. If using a nut milk bag hold the bag open over a large bowl and gently pour the blended almond milk into the middle of the open bag. Be careful not to spill pulp over the sides. Pour a little at a time and put the blender container down and close the bag at the top and squeeze the bag into the bowl to separate the almond pulp from the almond milk. You can either save the squeezed almond pulp to dry into almond flour or use to make cookies or nut balls or compost it. Continue this process until you have separate all the milk from the almond pulp. If you can’t stand and squeeze you can hang the bag filled with pulp and almond milk up above the bowl and let it drain for a while or in between breaks. Using a good quality nut milk bag you should only have to strain the milk one time if you didn’t spill any pulp over the edge.
3b. If using metal mesh strainers: get out 3 medium bowls or containers. Hold your small metal mesh strainer over one of the bowls and pour the almond mixture slowly into it. Fill up the strainer and then use a spoon to push the liquid down from the pulp. Place the extra pulp in one of the bowls if you want to save it for later. This will take a while. If using a metal strainer, keep filling it up with almond mixture and filtering the pulp from the milk with your spoon and set the pulp aside. Rinsing your strainer in between each filter will make it easier to strain and get rid of the little pieces stuck to it. After you have filtered your almond milk once, you may want to filter the whole thing a few more times for a smooth milk. Place your filter over the last clean bowl and pour your filtered almond milk over it. You should see some froth and a little pulp being filtered out the second time. Rinse your other bowl and strainer and filter back and forth until your almond milk is smooth to your liking. I do this 6-8 times with a metal strainer for the smoothest milk.
5. Once you’re done you can store the almond milk in the fridge. Depending what you want to do with it you can leave it plain, or blend in a date and some vanilla for sweet almond milk.
I leave mine plain so I can use it for things like banana ice-cream, chia “tapioca” pudding, smoothie base, dressing base etc. I just add pitted dates or vanilla extract or fresh vanilla bean to the recipe if I need a sweet milk.
Best used within 3 days. Store in a tightly sealed container in the refrigerator.
Have you ever made your own plant based milk at home? What’s your favourite?
Hi i am on a very strict diet i want to go vegan now ive lost 50 pounds already but now i am going vegan . Is almond milk very low in fat ? I use to use fat free milk before
I only use almond milk occasionally, so it can be part of a low fat diet yes. I wouldn’t eat it for every meal though.
Where can I find raw almonds? Here in Arizona all I can find are the ones from California and they pasturize theirs.
I think you’ll have to search online or order from canada. Its technically illegal to sell raw almonds in the usa now.
I made the almond milk without any sweeteners or flavourings and it was good to drink but when I put it into my coffee it was greasy, like if I had used whipping cream instead of low fat milk. I am looking for a way to skim off the fat, similar to how my Grandmother would have skimmed fat off of soup or stew. It separates in the mason jar in the fridge but I couldn’t figure out which part was the fat to remove. Any advice appreciated! It is a great milk alternative, it’s just the coffee creamer part I am trying to get right.
I wonder how we could get the nutritional info. The lowest fat content in store-bought almond milk (that I can find) is 2 g/cup. I would much rather make your recipe, but I hate adding fat, even good fat. (I know, I know…)
There’s no way to know really sorry. No nutritional lab here!
Thank you for your great replies to comments.
Great recipes, thanks, need to go out & get some more ripe bananas have some frozen ones. Where do you find Ceylon Cinnamon? Love cinnamon nutmeg & cloves will try eggnog soon. Thanks
I use this method, with a nut milk bag, only filtering once. I slightly sweeten with coconut palm sugar then I add vanila bean, almond extract and blend it with Exsula XtraPure soy lecithin sooooooooo creamy and delicious !!!!
yeah, that’s a pretty nice trick, but how do you justify “low fat”? almond is naturally very rich in (good) fat, but it’s still fat and some ppl like myself wouldn’t want that in their milk. 🙂
even if you made clear that during the process the fat is gone(?) i just didn’t realize it, so please explain. in this case i’m sorry i didn’t realize.
Hi Joanna,
It’s low in fat compared to whole almonds, because you are removing all of the almond pulp and left with the almond flavour. There is not that much fat in it. I am not sure what you mean by “some people like me would not like fat in their milk”.
ALL milks have fat in it. Even skim cow’s milk. When they say 2%, 1% etc that is percentage of fat by WEIGHT and not by calories. 1 cup of 1% milk has 2.4 g of fat in it and 102 calories. 21.6 of those calories are coming from fat. (Multiply 2.4 by how many calories are in a gram of fat (it’s 9 calories) and you get 21.6) Divide that by the total calories and your “1%” fat milk (by weight!) is actually 21% fat by calories. 2% milk has 139 calories per cup and 4.9 g of fat which makes it 32% fat by calories.
Almond milk is much lower in calories than cows milk because it has very little protein (less than 2 g per cup compared to cows milk at 9-10 g) Remember calves grow at exponential rates (they are adult at the age of 2) and this is why there is more protein and fat in their milk. Human babies grow and mature slowly reaching adult hood in 18 years.
I don’t know what the actual nutritional information of my raw almond milk is, but I do strain all of the particles out of it, so it would have less fat than if you didn’t. Regular store bought almond milk without sugar is about 40 calories per cup. This is a much lower calorie count compared to dairy milk, so I think having 40 calories from almond milk in a recipe or in cereal is very reasonable and no cause for concern.
You can always add even more water to the almond milk if you want. I know many people’s recipes use only 3 cups of water for 1 cup of almonds, but I use 4. So it is lower in fat.
Does this make the 4 cups or does it go down to 3 or ??? because of all the filtering. WOW! Didn’t know it was this easy.
Will be making some for baking as I am unable to use dairy. THANKS for posting a link on twitter.
It will make 3 cups because of the filtering. That’s why I like to used 4 cups of filtered water, that way I have enough raw almond milk for a few days. Add it to smoothies, soup, curries etc.
Homemade and preservative free!